Loading cart contents...
Documentation
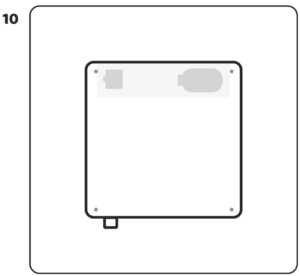
Controller
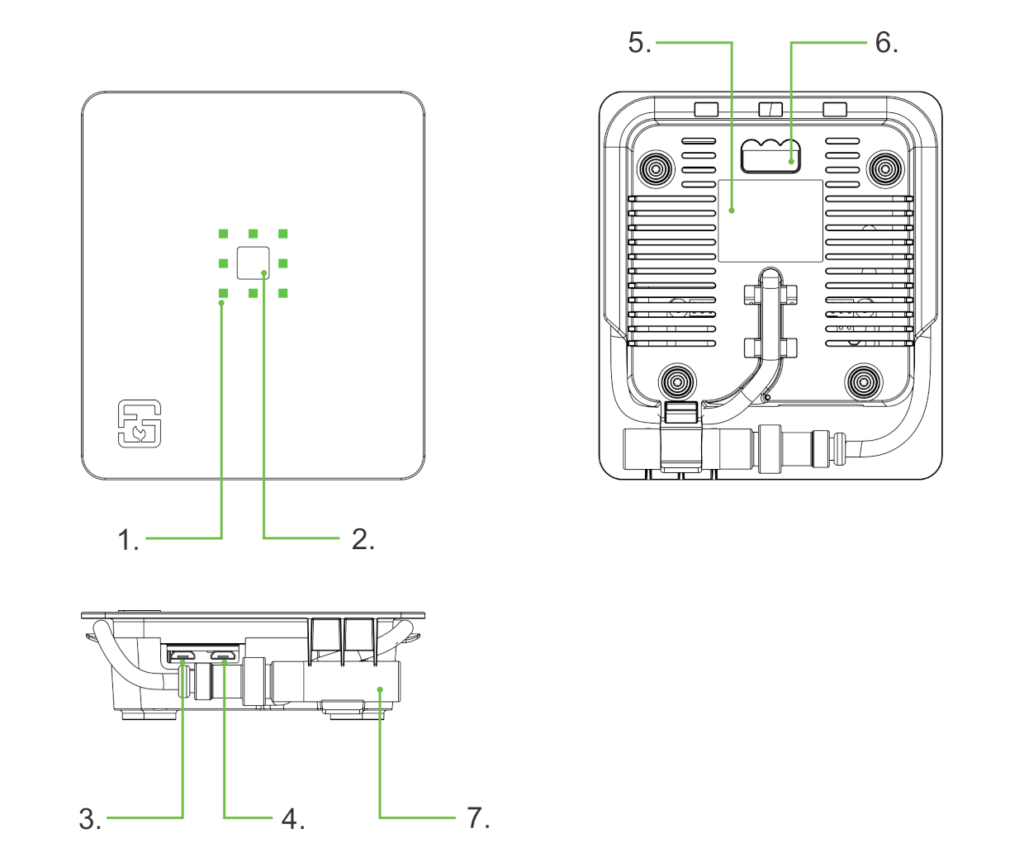
- Status LEDs
Show the current state of your Fridge Grow Controllers. - Button
Hold for 30sec to reset the controller to default settings. - Supply
Micro-USB supply, min. 2A - Webcam
>No longer supported< - Label
Serial number and WiFi credentials. - Mount
Can be hooked on a simple screw. - Sensor
Can be placed freely.

Ready – solid green
Everything OK. Your controller is configured and working.

Booting – green circle
Takes around one minute.

Not yet configured – solid yellow
You need to configure your controller before it can work.

Connected – blue/green circle
The controller is currently being accessed via the app or web-interface.

Update in progress – green/yellow circle
Your controller is currently updating. Please do not power off!

Programming mode – single yellow led in circle
The mode to configure your AC sockets is currently active. Be aware that control is disabled during this mode!

Connection attempt – blue circle
The controller is currently trying to connect to the specified WiFi network.

Warning – flashing green/yellow
A minor problem has occurred. Connect to your controller to learn more.

Error – flashing green/red
A major problem has occurred. Connect to your controller to learn more.

Hardware error – solid red
A serious hardware error has occurred. Please contact our support.
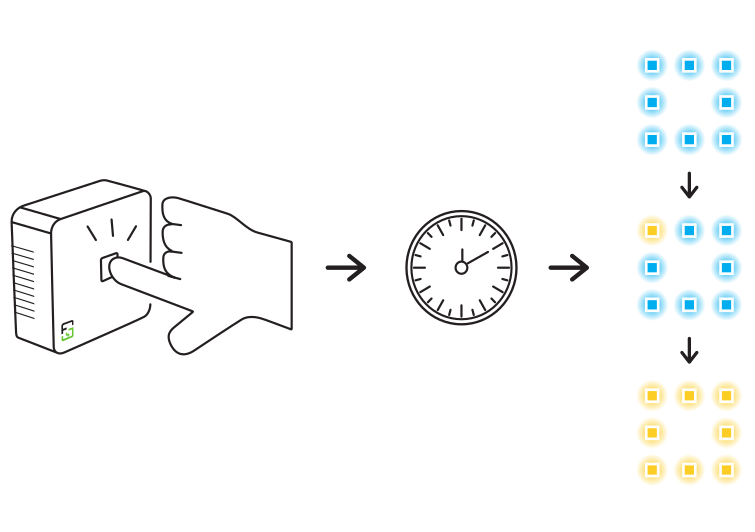
To reset your controller to factory defaults press and hold the button in the center of the controller until all LEDs have turned yellow. (Your controller must not be booting or updating.)
Controller
- Status LEDs
Show the current state of your Fridge Grow Controllers. - Button
Hold for 30sec to reset the controller to default settings. - Supply
Micro-USB supply, min. 2A - Webcam
Webcam can be connected via OTG adapter. - Label
Serial number and WiFi credentials. - Mount
Can be hooked on a simple screw. - Sensor
Can be placed freely.
Ready – solid green
Everything OK. Your controller is configured and working.
Booting – green circle
Takes around one minute.
Not yet configured – solid yellow
You need to configure your controller before it can work.
Connected – blue/green circle
The controller is currently being accessed via the app or web-interface.
Update in progress – green/yellow circle
Your controller is currently updating. Please do not power off!
Programming mode – single yellow led in circle
The mode to configure your AC sockets is currently active. Be aware that control is disabled during this mode!
Connection attempt – blue circle
The controller is currently trying to connect to the specified WiFi network.
Warning – flashing green/yellow
A minor problem has occurred. Connect to your controller to learn more.
Error – flashing green/red
A major problem has occurred. Connect to your controller to learn more.
Hardware error – solid red
A serious hardware error has occurred. Please contact our support.
To reset your controller to factory defaults press and hold the button in the center of the controller until all LEDs have turned yellow. (Your controller must not be booting or updating.)
Software
You can download our app in the appropriate app-store for your device. For android smartphones we also provide a direct apk download.
If you don’t own a smartphone you can also use our controller via its web-interface with any WiFi capable device with a browser.
![]()

If you do not have, or do not want to use a smartphone, you can also use our controller with any WiFi capable device via its web-interface. Just connect to the WiFi network of the controller and open the following address in your browser:
http://10.20.30.1
The following steps describe how you can use your Fridge Grow Controller to create the ultimate, hermetically sealed, grow tents.
The conversion is not difficult and can be done in about 1 – 2 hours.
If you need help, don’t hesitate to contact us through one of the following channels:
• Fridge Grow Telegram: https://t.me/fridgeGrowPublic
• Fridge Grow Forum: https://forum.fridgegrow.com/
• E-Mail: info@fridgegrow.com
NOTE:
All modifications must be carried out professionally and in compliance with all locally applicable regulations.
and, if in doubt, approved by a locally authorized specialist company before commissioning
become. All components used as well as the overall system must be expressly intended for the intended
Intended use be certified. We do not accept any liability for any damage.
Fridge Conversion Guide
Scope of delivery
FG-Controller
|
Lamp
|
Heater
|
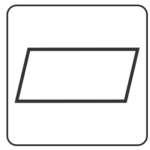
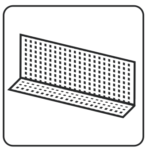
Perforated sheet
|
|---|---|---|---|
3x Fan
|
3x Remote Controlled Sockets
|
Tape
|
Power supply
|
Power distributor
|
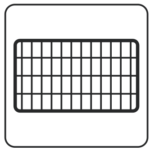
Grid
|
Aluminum sheet
|
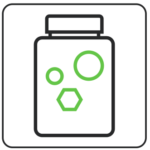
Trace elements
|
Tube
|
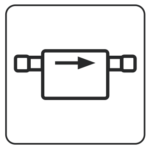
Valve
|
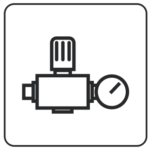
Pressure reducer
|
Sealant
|
Stand
|
Cable ties
|
What else do you need
(not included in the delivery)
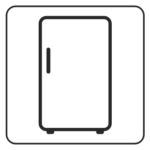
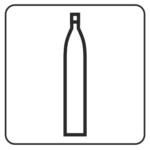
Fridge
|
Co2-cylinder
|
Scissors
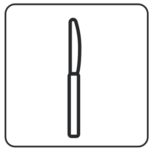
|
Butter knife
|
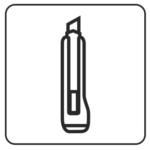
|---|---|---|---|
box cutter
|
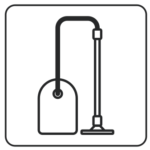
Vacuum cleaner
|
||
Important instructions!
Do not drill into walls
During the renovation, the refrigerator from Disconnect the power supply!
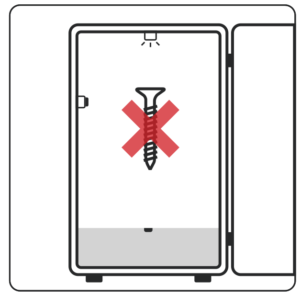
Do not screw any screws into the inner walls!

Before you plug the refrigerator back in, check that none of your steps have damaged any cables.
Preparation
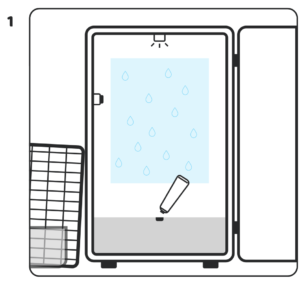
Remove the inside of your refrigerator and seal the drainage hole e.g. B. with the enclosed sealant. Turn it on and leave the door open for about 5 minutes until moisture builds up on the back.

Now you disconnect the refrigerator from the power supply.

Mark the boundaries of the area where moisture will condense on the back wall. Where it remains dry, you mark the place where you want to do the implementation.
Danger! There may be cables in the walls. Usually these only run on one side from the thermostat and light to a connection box near the compressor. The cables are usually routed in a hose, which often makes them difficult to recognize as such.
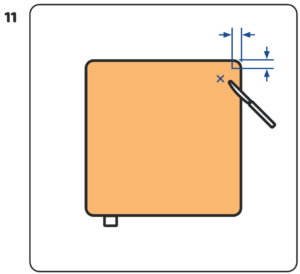
Variant 1 – hole in the rear wall
Next, you’ll need to make a hole to pass the cables and CO2 hose through. There are two Options for where to make the hole – either on the back wall or in the ceiling. First read you both Options and then decide which one suits your model better.
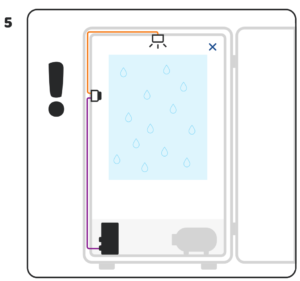
Basically, you can assume that One cable each from the light and one from the thermostat leads to an electrical box. If at all possible you place your lead-through hole on the opposite side. Mark the same Place on the back wall of your refrigerator like on the inside.
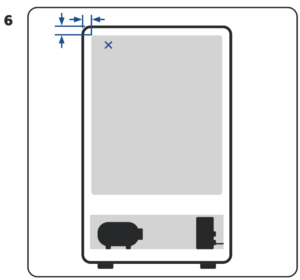
Note that the refrigerator is one wall thickness hat – choose the position of the hole so that you pierces inside the refrigerator. If your model has the Foam with z. B. covered a plastic plate you can carefully cut it out with a utility knife.
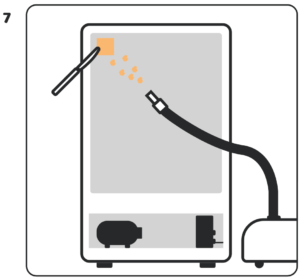
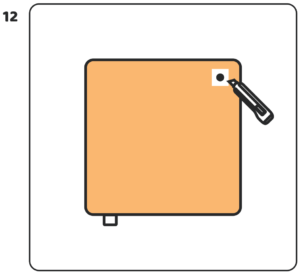
Under the cover (sometimes just aluminum foil) there is PU foam. You can do this carefully with a blunt object, such as z. B. Remove with a butter knife. This creates a lot of dirt, which you can directly with a Can catch the vacuum cleaner.

If you go with the butter knife up to the Have prepared the inside wall of the refrigerator, do you need the utility knife again to to make a hole. Note that the heater and lamp plugs also go through this hole have to fit.
Variant 2 – hole in the ceiling
At the rear is the compressor stage, where the compressor and other technical components are housed. The cables mentioned above come out on one side, which are often guided in a plastic tube.
Some refrigerators have a cover on the top, which you can easily remove, usually with 4 screws. This variant is ideal for making the hole for the cables on the top.
There is PU foam under the cover. You can carefully use a blunt object, such as a pencil, to do this. B. Remove with a butter knife. Note that the refrigerator has a wall thickness – choose the position of the hole so that you pierce the interior of the refrigerator and do not get lost in the side wall.
When you have worked your way up to the inside wall of the refrigerator with the butter knife, you will now need the carpet knife again to make a hole. Note that the plugs for the heater and lamp must also fit through this hole.
Conversation

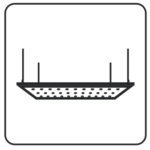
So that the condensation water from the back wall in your plant pot can be headed you cut the enclosed aluminum sheet – as high as necessary, as wide as possible.

When cutting, make sure that your plant pot fits under the sheet metal. The sheet should be wider than the marked area so that the condensation does not run past the side.

You can do this with the included tape Place the sheet below the area where moisture forms. Bend the corners of the Sheet metal so that the water is directed into the plant pot.
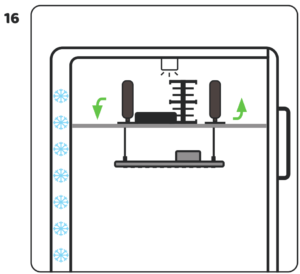
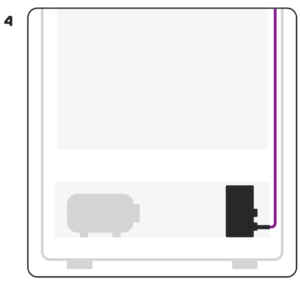
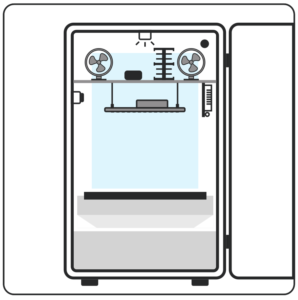
Now you can use the lamp, fan, heater and Power supply for fans and controllers in Place the refrigerator. Set up the fans so that the air can circulate. CO2 hose and You lead the cable from behind through the hole in the Inner space. You set up the third fan your plant.
CO2

You have different options for the controller to place in your closet. We recommend you to hang it on the grille with cable ties.

Now to the CO2 supply: make sure everything is closed. Put the union nut off the Pressure reducer over the hose and bring this on the pressure reducer.

Now you can switch the pressure reducer to the CO2 Mount the cylinder. Screw the bottle quickly on the pressure reducer so that no CO2 escapes.
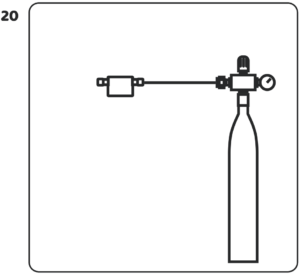
At the other end of the hose you now bring the CO2 valve on.
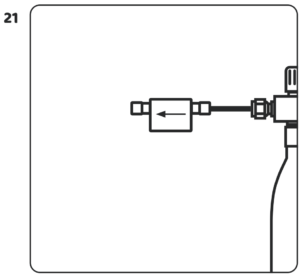
Pay attention to the direction of the arrow on the valve – the arrow must point away from the CO2 cylinder.

Attach one to the free side of the valve another piece of hose, which you then insert into the Leading the refrigerator.

Now supply the CO2 valve with electricity.

To be able to adjust the amount of CO2, you hang you put the hose in a glass of water. Turn carefully on the valve until there are small bubbles in the Form water. The CO2 setting should be chosen so that CO2 is as slow as possible, but Reliably flows out – one or two bubbles in the Seconds are a good guideline.
Completion
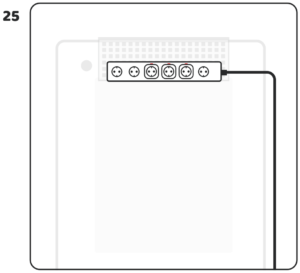
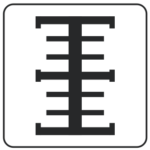
Next you attach the included Perforated sheet metal with tape on top of the Refrigerator. You can attach it with cable ties mount the power distributor and then plug in the radio sockets.
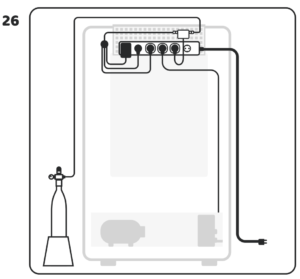
Plug the heater, refrigerator and CO2 valve into the radio-controlled sockets. Lamp and supply for controller and fan.
When everything is connected, you can the hole again with the enclosed sealant close.

The conversion is done!
Commissioning – controller
You have successfully converted your refrigerator into a climate chamber. Now all you have to do is remove the Fridge Download the Grow App and follow the wizard to set up your controller. Before you really get started, read please read the notes on commissioning on the next page beforehand.

Download the Fridge Grow app either from Google Playstore, or in the Apple App Store and install them. Scan the QR code to go directly to be forwarded for download.

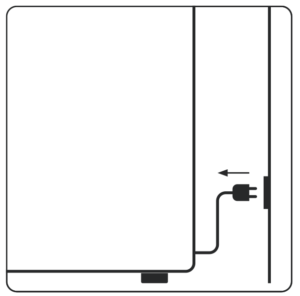
Power the controller via a micro USB cable with electricity. As soon as the controller is connected to the power, the boot process begins automatically. Realize this make sure that the LEDs light up green all around start.

As soon as the boot process is completed, the LEDs light up continuously yellow or green. Yellow means that the controller is set to factory settings is set – green that it is already configured.

Now start the app and follow the wizard. Much Fun!
Commissioning – important information
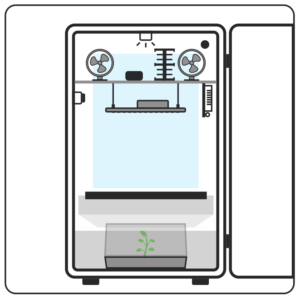
If your plant is still very small, recommend we to use a mini greenhouse with cover. Select the “greenhouse mode” in the app.
If you want to check that your system works, but you don’t have a plant yet, also select the “greenhouse mode”.
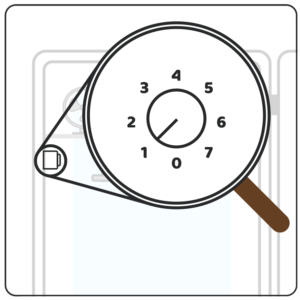
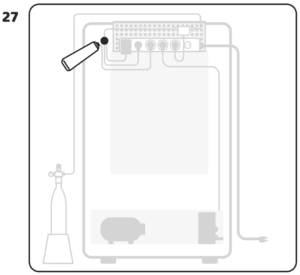
Set your refrigerator on the warmest level. Usually there is a twist inside regulator (often the warmest level is “1”).
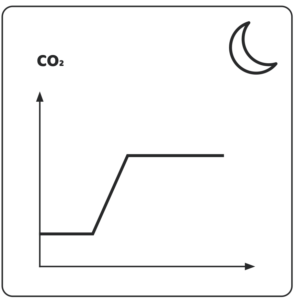
At night, the CO2 value can be due to microbiological processes in the earth or the Increase fertilizer. More information can be found you at forum.fridgegrow.com, or on ours Youtube channel.
Trace elements
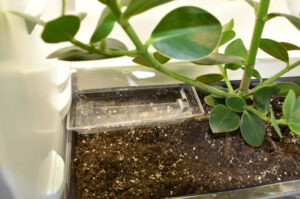
By reusing the water in the Fridge Grow system, trace elements can be added to the plants are normally supplied via the irrigation water, may be present in too small quantities. In order to provide your plants with the best possible care, you can give them the included trace elements.

The micronutrient fertilizer contains traces of Manganese, boron, iron, molybdenum, cobalt and high Share of copper and zinc.

You should have one or two balls per liter of soil Spread under the drip tray.
Due to the closed system and the recirculating water, many people make the mistake of watering the plants at the beginning. If this happens to you, you can either place a bowl under the drip tray or Remove this completely (don’t forget to remove any stubble in the hole) to give water to the system refer to. Please note that the vaporizer tray will eventually pass over. The evaporator dish is the plastic container on the back of the compressor of your refrigerator, into which the drain hole opens. The general rule is: be Be careful when watering and inform yourself about the correct soil moisture for your plant. The pouring intervals at Fridge grow systems can be very long.
Umbauanleitung
Scope of delivery
FG-Controller
Lamp
Heater
Perforated sheet
3x Fan

3x Remote-controlled socket
Tape

Power supply

Power distributor

Grid

Aluminum sheet

Trace elements

Tube

Valve
Pressure reducer
Sealant
Stand
Cable ties
What else do you need
(not included in the delivery)
Fridge
Co2-cylinder
Scissors

Butter knife
Box cutter
Vacuum cleaner
Important instructions!
Do not drill into walls
During the renovation, the refrigerator from Disconnect the power supply!
Do not screw any screws into the inner walls!
Before you plug the refrigerator back in, check that none of your steps have damaged any cables.
Preparation
Remove the inside of your refrigerator and seal the drainage hole e.g. B. with the enclosed sealant. Turn it on and leave the door open for about 5 minutes until moisture builds up on the back.
Now you disconnect the refrigerator from the power supply.
Mark the boundaries of the area where moisture will condense on the back wall. Where it remains dry, you mark the place where you want to do the implementation.
Danger! There may be cables in the walls. Usually these only run on one side from the thermostat and light to a connection box near the compressor. The cables are usually routed in a hose, which often makes them difficult to recognize as such.
Variant 1 – hole in the rear wall
Next, you’ll need to make a hole to pass the cables and CO2 hose through. There are two Options for where to make the hole – either on the back wall or in the ceiling. First read you both Options and then decide which one suits your model better.
Basically, you can assume that One cable each from the light and one from the thermostat leads to an electrical box. If at all possible you place your lead-through hole on the opposite side. Mark the same Place on the back wall of your refrigerator like on the inside.
Note that the refrigerator is one wall thickness hat – choose the position of the hole so that you pierces inside the refrigerator. If your model has the Foam with z. B. covered a plastic plate you can carefully cut it out with a utility knife.
Under the cover (sometimes just aluminum foil) there is PU foam. You can do this carefully with a blunt object, such as z. B. Remove with a butter knife. This creates a lot of dirt, which you can directly with a Can catch the vacuum cleaner.
If you go with the butter knife up to the Have prepared the inside wall of the refrigerator, do you need the utility knife again to to make a hole. Note that the heater and lamp plugs also go through this hole have to fit.
Variant 2 – hole in the ceiling
At the rear is the compressor stage, where the compressor and other technical components are housed. The cables mentioned above come out on one side, which are often guided in a plastic tube.
Some refrigerators have a cover on the top, which you can easily remove, usually with 4 screws. This variant is ideal for making the hole for the cables on the top.
There is PU foam under the cover. You can carefully use a blunt object, such as a pencil, to do this. B. Remove with a butter knife. Note that the refrigerator has a wall thickness – choose the position of the hole so that you pierce the interior of the refrigerator and do not get lost in the side wall.
When you have worked your way up to the inside wall of the refrigerator with the butter knife, you will now need the carpet knife again to make a hole. Note that the plugs for the heater and lamp must also fit through this hole.
Modification
So that the condensation water from the back wall in your plant pot can be headed you cut the enclosed aluminum sheet – as high as necessary, as wide as possible.
When cutting, make sure that your plant pot fits under the sheet metal. The sheet should be wider than the marked area so that the condensation does not run past the side.
You can do this with the included tape Place the sheet below the area where moisture forms. Bend the corners of the Sheet metal so that the water is directed into the plant pot.
Now you can use the lamp, fan, heater and Power supply for fans and controllers in Place the refrigerator. Set up the fans so that the air can circulate. CO2 hose and You lead the cable from behind through the hole in the Inner space. You set up the third fan your plant.
CO2
You have different options for the controller to place in your closet. We recommend you to hang it on the grille with cable ties.
Now to the CO2 supply: make sure everything is closed. Put the union nut off the Pressure reducer over the hose and bring this on the pressure reducer.
Now you can switch the pressure reducer to the CO2 Mount the cylinder. Screw the bottle quickly on the pressure reducer so that no CO2 escapes.
At the other end of the hose you now bring the CO2 valve on.
Pay attention to the direction of the arrow on the valve – the arrow must point away from the CO2 cylinder.
Attach one to the free side of the valve another piece of hose, which you then insert into the Leading the refrigerator.
Now supply the CO2 valve with electricity.
To be able to adjust the amount of CO2, you hang you put the hose in a glass of water. Turn carefully on the valve until there are small bubbles in the Form water. The CO2 setting should be chosen so that CO2 is as slow as possible, but Reliably flows out – one or two bubbles in the Seconds are a good guideline.
Komplettierung
Next you attach the included Perforated sheet metal with tape on top of the Refrigerator. You can attach it with cable ties mount the power distributor and then plug in the radio sockets.
Plug the heater, refrigerator and CO2 valve into the radio-controlled sockets. Lamp and supply for controller and fan.
When everything is connected, you can the hole again with the enclosed sealant close.
The conversion is done!
Commissioning – controller
You have successfully converted your refrigerator into a climate chamber. Now all you have to do is remove the Fridge Download the Grow App and follow the wizard to set up your controller. Before you really get started, read please read the notes on commissioning on the next page beforehand.
Download the Fridge Grow app either from Google Playstore, or in the Apple App Store and install them. Scan the QR code to go directly to be forwarded for download.
Power the controller via a micro USB cable with electricity. As soon as the controller is connected to the power, the boot process begins automatically. Realize this make sure that the LEDs light up green all around start.
As soon as the boot process is completed, the LEDs light up continuously yellow or green. Yellow means that the controller is set to factory settings is set – green that it is already configured.
Now start the app and follow the wizard. Much Fun!
Commissioning – important information
If your plant is still very small, recommend we to use a mini greenhouse with cover. Select the “greenhouse mode” in the app.
If you want to check that your system works, but you don’t have a plant yet, also select the “greenhouse mode”.
Set your refrigerator on the warmest level. Usually there is a twist inside regulator (often the warmest level is “1”).
At night, the CO2 value can be due to microbiological processes in the earth or the Increase fertilizer. More information can be found you at forum.fridgegrow.com, or on ours Youtube channel.
Trace elements
By reusing the water in the Fridge Grow system, trace elements can be added to the plants are normally supplied via the irrigation water, may be present in too small quantities. In order to provide your plants with the best possible care, you can give them the included trace elements.
The micronutrient fertilizer contains traces of Manganese, boron, iron, molybdenum, cobalt and high Share of copper and zinc.
You should have one or two balls per liter of soil Spread under the drip tray.
Due to the closed system and the recirculating water, many people make the mistake of watering the plants at the beginning. If this happens to you, you can either place a bowl under the drip tray or Remove this completely (don’t forget to remove any stubble in the hole) to give water to the system refer to. Please note that the vaporizer tray will eventually pass over. The evaporator dish is the plastic container on the back of the compressor of your refrigerator, into which the drain hole opens. The general rule is: be Be careful when watering and inform yourself about the correct soil moisture for your plant. The pouring intervals at Fridge grow systems can be very long.
Grow tips
A closed system handles a bit different than conventional grow-boxes. We have collected a few tips for you to ease your way into this new style of growing.
Use solid fertilizer
Dosing liquid fertilizer can be a bit tricky in a closed system, thats why we’d recommend, especially for beginners, to use solid fertilizer instead.
Solid fertilizer can simply be added to the soil and used just like in a conventional grow-box.
Liquid fertilizer must be given in high doses
If you choose to still use liquid fertilizer make sure to use a much higher dose than you normally would. This is because any nutrient solution you add constantly gets diluted by re condensed water.
You will need around 10 times more fertilizer per liter of water than usual. However, this value highly depends on your setup and type of plants. Also not every fertilizer can safely be added in such a high concentration. Therefore we do not recommend the usage of liquid fertilizers.
Be aware of over watering
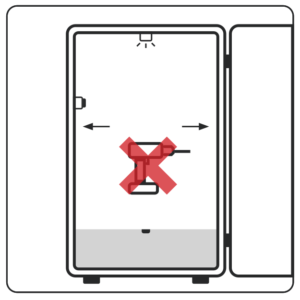
Due to the highly reduced water consumption inside a sealed system plants are much more susceptible to over watering then normally.
Pay attention to the weight of your pots and make sure the soil is only damp and not completely wet.
Extracting water
Whether you over watered your plants or just want to dry them out so you can add more nutrient solution, there is a simple way to extract water from the system.
Simply put one or two small pots under the aluminum sheet to collect the condensing water and empty them out regularly until your soil has dried out as desired.